Friday, April 25, 2014

Roasted Pepper Tomato Salsa

Yield: About 16 to 18 pints

7  quarts peeled, cored, chopped paste tomatoes                 
4 cups seeded, chopped long green chiles                         
5 cups chopped onion                                                         
½ cup seeded, finely chopped jalapeño peppers                    
6 cloves garlic, finely chopped                                              
2 cups bottled lemon or lime juice

2 TBSP salt
1 TBSP black pepper
2 TBSP ground cumin (optional)
3 TBSP oregano leaves (optional)
2 TBSP fresh cilantro (optional)

 Caution: Wear plastic or rubber gloves and do not touch your face while handling or cutting hot peppers. If you do not wear gloves, wash hands thoroughly with soap and water before touching your face or eyes.

Preparing Peppers: The jalapeño peppers do not need to be peeled. The skin of long green chiles may be tough and can be removed by heating the peppers. Usually when peppers are finely chopped, they do not need to be peeled. If you choose to peel chiles, slit each pepper along the side to allow steam to escape. Peel using one of these two methods:
  • Oven or broiler method to blister skins - Place chiles in a hot oven (400°F) or broiler for 6 to 8 minutes until skins blister.
  • Range-top method to blister skins - Cover hot burner (either gas or electric) with heavy wire mesh. Place peppers on burner for several minutes until skins blister.
  • To peel, after blistering skins, place peppers in a pan and cover with a damp cloth. (This will make peeling the peppers easier.) Cool several minutes; slip off skins. Discard seeds and chop.
Hot Pack: Combine all ingredients except cumin, oregano and cilantro in a large saucepot and heat, stirring frequently, until mixture boils. Reduce heat and simmer for 10 minutes, stirring occasionally. Add spices and simmer for another 20 minutes, stirring occasionally. Ladle hot into clean, hot pint jars, leaving ½-inch headspace. Remove air bubbles and adjust headspace if needed. Wipe rims of jars with a dampened, clean paper towel; apply two-piece metal canning lids. Process in a boiling water canner for 20 minutes (here in Utah).

IMPORTANT:
The only change you can safely make in this salsa recipe is to change the amount of spices and herbs. Do not alter the proportions of vegetables to acid and tomatoes because it might make the salsa unsafe. Do not substitute vinegar for the lemon juice.

Source: http://nchfp.uga.edu/how/can_salsa/tomato_salsa_paste_tomatoes.html  All canning recipes on this website have been tested to be assured of their safety.  See link for additional processing times in other locations.  Please check for for additional processing times in other parts of the world.  

Easy Grape Juice


Easy Grape Juice


Choose ripe, tight-skinned, preferably green seedless grapes or purple concord grapes once they reach optimum eating quality (you can tell by tasting them, if they are very sweet they are ready.  You can also tell if they are ready to pick if the seed inside has turned a darker color.  Once the seed is dark and the grapes taste very sweet, they are ready to harvest).  Stem, wash, and drain grapes.

Fill jars with 1 ½ cups of grapes, ¼ cup sugar and fill the rest of the jar with boiling water, leaving 1-inch headspace. Have lids simmering in hot water.  Add lids, tighten rims, and process according to the recommendations in Table 1.  With where I live, I process my quart jars for 30 minutes.


*****
If you don't have a juice steamer, this is such an easy way to bottle grape juice.  The final juice isn't as flavorful as juicing the grapes, but they taste wonderful and it's really easy.  Guidelines are from the National Center For Food Preservation.  Our grapes are ready to harvest at different times depending on the weather that year.  They are generally ready 1-2 weeks after our Lemon Elberta Peach tree.  It has been as early as the end of August and as late as the end of September. 

Sunday, October 2, 2011

Grapes 2011


We had an incredible harvest from our grapes this year- 4 large boxes. The Thompson green seedless grape (that still produces a seed in our region) did amazing! Huge grapes in very large clusters. The concord grapes still produced well but the grapes were a smaller size and the clusters were smaller as well.

We didn't heavily prune this season so the large leaves hid a lot of the grapes and we didn't have any problems with birds this year, we didn't even net the grapes.

Notes for years going forward:

1. To check for ripeness, taste the grapes to see if they are sweet, pop out the seed to see if the seed has changed from a light green to a dark brown. Once dark brown they are ready.
2. Harvest in 2-3 different sessions. Picking everything in one day was way too much.

*****
We processed 2/3 of our grapes into 70 quarts of grape juice and gave away the remaining 1/3.

Small Batch Canning


If you have a glass top stove and can't use a large water bath canner on your stove, you can always work in small batches canning 5 pint jars or 4-5 quart jars in a large stock pot. The jars need to be lifted off the bottom of the pot. You can purchase a small canner tray from Amazon or tie a few canning lids together and place them at the bottom of the pot to keep the jars lifted off the bottom.

This is also a great method if you don't own a large water bath canner. I have used this method for processing small batches of tomato sauce and it works great.

To work around not being able to use my large water bath canner on my glass top stove, I set up my camp chef outside on our deck and process the jars outside. This frees up space on my stove for blanching, boiling water and simmering lids. It also keeps the majority of the heat outside.

Canning Tomato Sauce


Wash, remove stems, and trim off bruised or discolored portions. To prevent juice from separating, quickly cut about 1 pound of fruit into quarters and put directly into saucepan. Heat immediately to boiling while crushing with a potato masher.

Continue to slowly add and crush freshly cut tomato quarters to the boiling mixture. Make sure the mixture boils constantly and vigorously while you add the remaining tomatoes. Simmer 5 minutes after you add all pieces. If you are not concerned about juice separation, simply slice or quarter tomatoes into a large saucepan. Crush, heat, and simmer for 5 minutes before juicing.

Press heated crushed tomatoes through a sieve or food mill to remove skins and seeds. Simmer tomato juice in large-diameter saucepan until sauce reaches desired consistency. Boil until volume is reduced by about one-third for thin sauce, or by one-half for thick sauce.

Add bottled lemon juice and salt to hot jars. Fill jars with hot tomato sauce, leaving ¼-inch head space.

Adjust lids and process the correct time for your altitude (I process my pint jars for 45 minutes and quart jars for 50 minutes).

Add to pint size hot canning jars:
1 TBSP lemon juice (to achieve proper acidity levels for safe canning)
½ tsp. salt (optional)

Add to quart size hot canning jars:
2 TBSP lemon juice (to achieve proper acidity levels for safe canning)
1 tsp. salt (optional)


*****
I like to can my tomato sauce plain without additional seasonings so I can add the seasonings depending on what I'm using it for. Guidelines are from the National Center for Home Preservation .

2011 Peach Harvest


We had a fabulous peach harvest this year even though we had a hard freeze the night our peach tree was blooming. We covered several of the branches with large sheets and it looks like those are the only branches that produced fruit. Because the harvest was small, the peaches were extra large. This was a good reminder for us to always thoroughly thin our peach tree each year.

I also need to remember in years going forward to wait until the peaches are a golden orange all around with no trace of green and plan to pick in 3 batches. Once the peaches start to ripen they look ready outside in the sunlight but it really takes an additional week of patience until they are ready to pick.

This was a late year for us. In 2011 our first peach was ripe September 12th with 1-3 peaches ready to eat each day until September 21st when we bottled 60% of the tree. We picked and bottled the remaining 40% on September 23rd. We bottled 35 quarts this year.

Canning Peaches


Canning Peaches

http://enjoyingtheharvest.blogspot.com/

1. Wash jars and lids, then leave in dishwasher to keep warm
2. Wash peaches in a clean sink with cold water
3. Boil water for syrup
4. Blanch peaches in boiling water for 30-60 seconds, then submerge blanched peaches
in ice cold water
5. Peel skin, remove pit and slice in half (or in thirds for extra large peaches).
Store sliced peaches in a bowl of cold water while preparing enough slices for a
batch.

6. Heat water to 180 F, simmer lids in water
7. Add 2/3 cup sugar to each quart jar, then add 1 cup of boiling water. Stir until
dissolved, then pack peaches to ½ inch below rim.
8. If needed add more water to cover all peaches
9. Wipe down jar top and place lid and screw on ring finger tight
10. Place jars in rack above boiling water to acclimate

11. After a minute or two gently lower jars into hot water. Add more water to
ensure jars are covered by 1” of water.
12. Bring to a boil and start timer
13. After processing for the correct time for your altitude (I process mine for 25
minutes), remove from water and allow to cool at room temperature and free from
drafts
14. The following day, remove rings, check seals and wash jars.
15. Home process foods last for up to 3 years.

*****
On the stove you will want a large stock pot to blanch the peaches, a medium size pot to boil water to pour into the jars and a small pot to simmer the lids. I put my large water bath canning on our propane camp chef outside on the back patio. It frees up room on our stove and keeps all the heat outside.

A bushel weighs 48 pounds and yields 16-24 quarts (2.5 pounds per quart)

Guidelines are from the National Center for Home Preservation


Staking Tomatoes- Florida Weave


This year we staked all of our tomatoes with the Florida Weave technique and it's been my favorite way to stake the tomatoes so far as it uses less T stakes and it keeps the walkways clear between the rows of tomatoes.

We used (1) T stake for every two tomato plants, then weaved twine between the plants and stakes. We did a total of three rows of twine (adding a row as the plants grew). Here is a website that gives more detailed instructions.

Thursday, July 7, 2011

Renovating Strawberry Beds


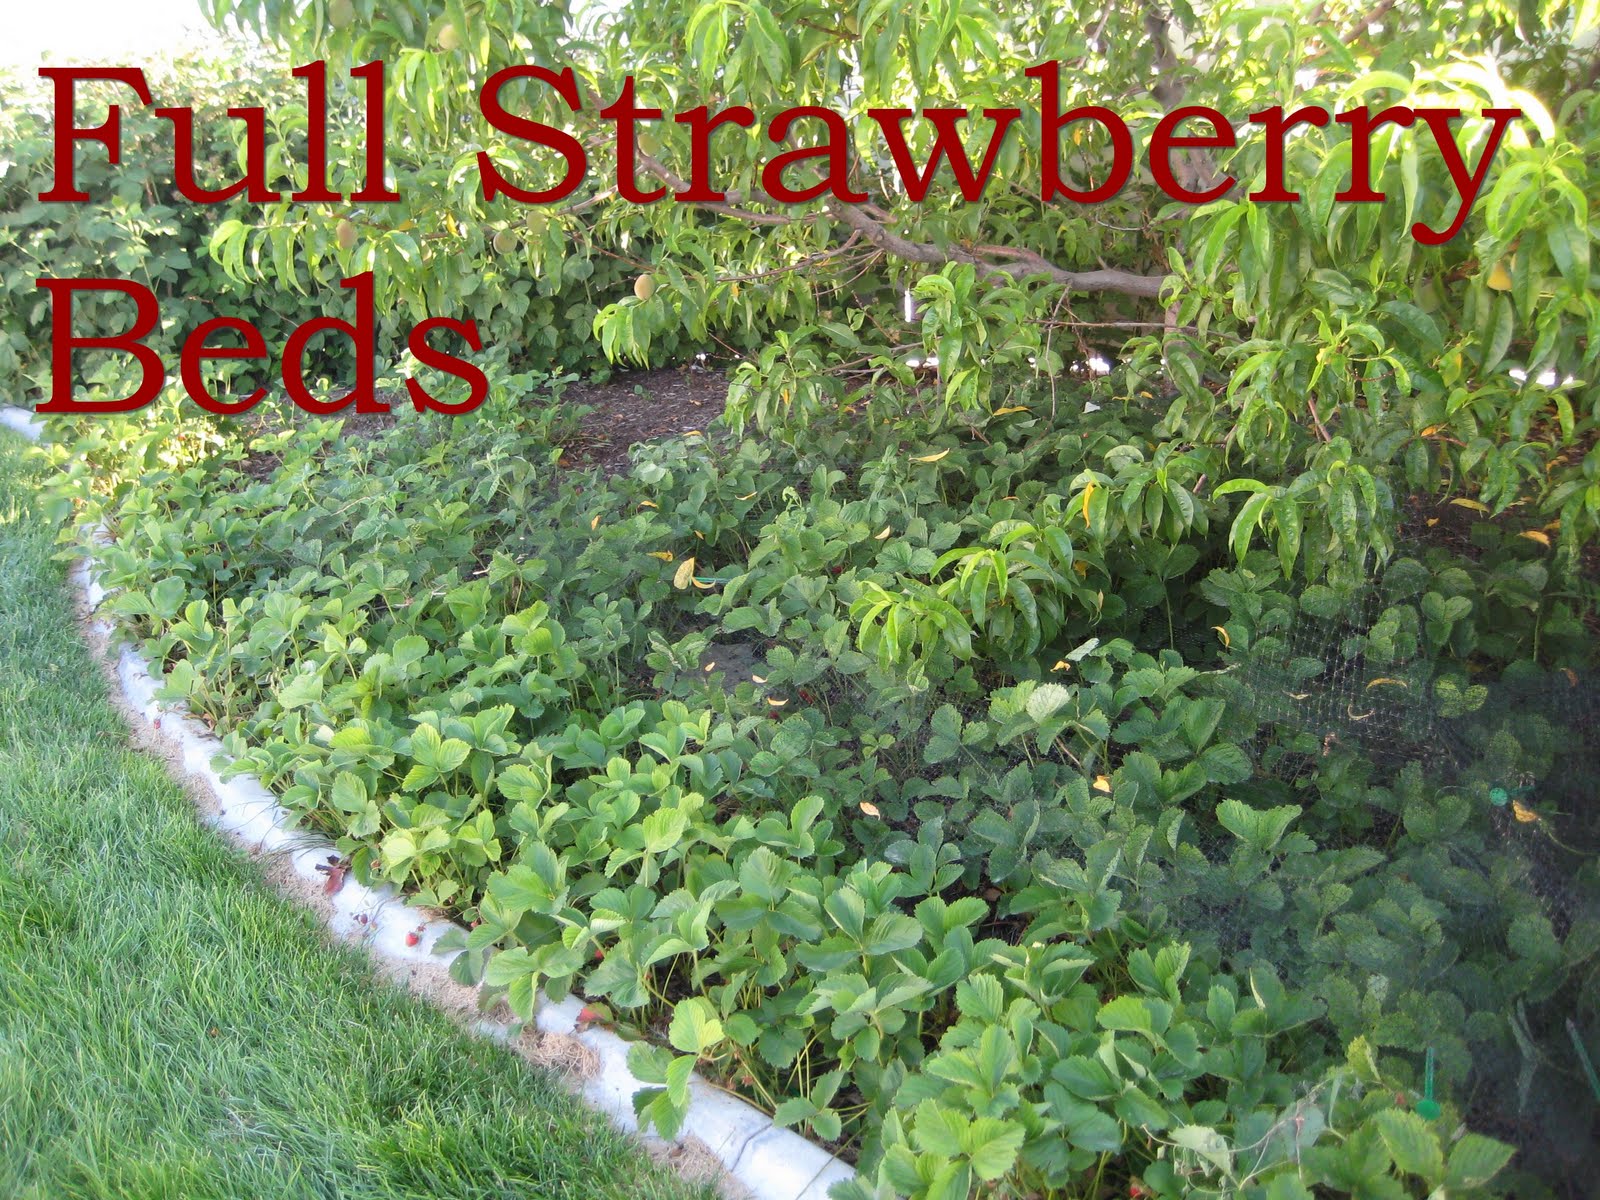
We were finally able to dedicate some time to our strawberry beds to keep them producing large berries.

Even after ignoring the beds for the past three years they have stilled been amazing producers. This season (2011) averaged 4-5 cups a day at the beginning of the harvest and ended in 10 cups a day during the last week of the harvest with some days as large as 20-30 cups a day. Even with the large crops and large berries, some of the plants are producing small berries this season so it time for renovating the bed.

Here is what we did this year and hope to continue doing each season.

1. Immediately after harvest (within one week of picking the last berry and no later than July 15), trim leaves within 3” of the crown. Remove cut leaves and debris from bed. This can be done by mowing the strawberry patch with a mower set to it's highest setting.

2. Remove old/mature plants, leaving the new daughter plants. Space plants 8” apart in 3 foot wide rows. As the daughter plants fill in through the summer the rows will end up being 2 feet apart. We could have thinned ours even more but after pulling out a few hundred plants we decided we were done for now.

3. Fertilize with a 10-10-10 mixture.

Iowa State’s extension service
is a great resource for more details on renovating strawberry beds to keep them producing large healthy crops.

Friday, July 1, 2011

Preserving Carrots


When harvesting carrots, we generally have too many to eat fresh. We chop and freeze many for soups. We also use carrot juice to add to smoothies, so we juice all of our extra carrots and freeze in ice cube trays. Once frozen, we place the frozen cubes in quart size bags to later add to smoothies.

Monday, June 27, 2011

Gardening with kids


I’ve found the more my daughter is involved with gardening and cooking in the kitchen, the more willing she is to try new foods, experiment with flavors and sample new combinations. The more she learns about fruits and vegetables, the more excited she is when they are ready to harvest.

Just over a year ago I made this felt playhouse for my daughter to have her very own garden year round to plant and harvest. It has been a huge hit! It gets the most attention out of everything in the playroom when friends come over. Hours are spent planting, picking, washing and eating. I love that my daughter and her friends get so much enjoyment from planting potatoes and picking apples from the tree.


My inspiration for this project came from this incredible blog.

Saturday, June 25, 2011

Gardening Companions- Lettuce and Tomatoes


Space is always tight in our garden and each year I try to find new ways to get the biggest crop from our small garden.

This year our tomatoes and lettuce are sharing a raised bed together and I've loved how it has worked out! While the tomato plants are still small, the lettuce and spinach are flourishing. Once the tomato plants crowd out the lettuce it will be about the time the weather gets too warm for lettuce.

I have read that tomato plants will shade the lettuce as the weather warms up helping to extend the harvesting time of lettuce and spinach. We'll see how it goes.


Dinner tonight
: Balsamic vinegar chicken salad with fresh strawberries, lettuce and spinach from the garden.

Tuesday, June 14, 2011

Honeoye Junebearing Strawberries


My 3 year old daughter divides the year into two sections- when strawberries are growing in the backyard and when she is waiting for the strawberries to start growing. She is in heaven starting late May when these berries appear and sheds a few tears at the end of June when the crop finishes. Then the long wait begins until they arrive next spring.

She has renamed these berries as "sweetie-sweets" as they are so sweet compared to the store varieties. When you place grocery store varieties side by side to home grown berries, they really can't compare.

The Honeoye variety sold from Gurneys is our favorite as they are a large, extra sweet, deep red berry. We have had them for several years and they still produce a large berry with a yield of 3-4 cups a day for 5-6 weeks. We started with 4 varieties of berries and loved the Honeoye so much, we ripped out the other 3 varieties and have stayed loyal ever since.

They are amazing fresh, fantastic frozen and make a great jam.


Average crop when we pick every other day (minus how many we eat while picking):

Thursday, June 9, 2011

Hoop Houses


A few years ago we added mini hoop houses to cover our raised garden beds. They add about 6 weeks to the growing season in the spring and if you put them back on in the fall they can extend the end of the growing season by several weeks as well.

We made the hoops from flexible electrical PVC pipe. We connected a galvanized steel pipe strap to the sides of our raised beds and threaded the PVC pipe through the straps to hold them in place. This also makes the pipe easy to remove once the weather warms up.

We then covered the mini hoop houses with 6 mil (heavy) clear plastic. The plastic is sold in long rolls in the painters section of a home improvement store. The plastic is held in place with A clamps.

These mini hoop houses have made it possible to start our garden several weeks earlier and protect the tender plants from strong winds and storms.

The biggest challenge of these hoop houses is to find a balance of not exposing the tender plants too much to the cold air of early April, but venting them enough that they don't get too hot inside. This has only been especially challenging on a very sunny but frigid cold day where the temperature is 30 F but it's so sunny the hoop house gets too hot inside. I generally lift up the plastic 2-3" on each side by 9am to allow air flow, then close them at night.

As the weather warms up, I open the sides more and more. Then by mid May I remove the covers during the day and only cover at night if the temperature is predicted to drop too much.

Overall we have been so happy with these covers and they have made it possible to plant and harvest much earlier.

2011 Garden Journal- Spring


This year we started seeds indoors much earlier and enjoyed having a winter harvest of greens indoors. On December 8th I planted butter crisp, long leaf lettuce and spinach. By the end of December we had enough greens to eat small salads through the rest of the winter. These were grown under our shop lights with the timer on for 14-16 hours a day. What a great treat through the winter! We also started basil, parsley, oregano, savory, margarum and cilantro. These didn't grown large enough to harvest much through the winter but they were nice large plants to transplant in the spring. All transplanted well except for the cilantro.


April 16- Planted carrots, parsnips, potatoes, onions and garlic. On the very north end of our raised garden box we tried a new onion variety- White Ebenezer along with our traditional Yellow onions.

April 19- Planted tomatoes. May 1- tomatoes died from the hard freeze or getting too hot the following morning. Very challenging to water by hand this early in the season before our secondary water is turned on. Replanted tomatoes.

May 5- Tomatoes died again from too much heat and not enough water!!! Replanted and they are now all happy!

Now that everything is planted and happy, here is the run down of what we planted this year:

(12) Tomatoes: Mortgage lifters- indeterminate (our favorite)
(4) Tomatoes: John Flamme- indeterminate (new variety for us to try that are supposed to be excellent for roasting
(6) Tomatoes: Beefstake- indeterminate
(8) Tomatoes: Moscow
(3) Tomatillo
(3) Jalapeno
(3) Ancho peppers
(6) Anaheim peppers
(6) Bell peppers
(6) Celery
(12) Potato starts
(3) Watermelon
(3) Cantalope
(100) White Ebenezer onions
(100) Yellow Onions
(25) Garlic
(4) Swiss Chard
(6) Cauliflower
Carrots
Parsnips
Peas


Grape vines are growing well, Heritage raspberries are staying contained, Canby raspberries are trying to creep too close to the peach tree.

Strawberries are producing excellent amounts of berries- thinning them last fall really helped. First ripened berry this year was June 8th- a pretty late year due to the cold weather.

Lemon Elberta Peaches


I grew up eating Lemon Elberta peaches and they are still my all time favorite peach. They are a reliable frost hardy yellow freestone for Utah and Pacific NW. They are fabulous eaten fresh from the tree, great dehydrated, frozen and canned. Because they are a freestone it's easy to remove the pits and the canning process runs smoothly.

Harvest from 2010


Mortgage Lifters


We have found out all time favorite tomato variety- Mortgage Lifters. The flesh of Mortgage Lifter is thick, tangy, juicy, with relatively few seeds and not too acidic. We have grown a lot of varieties but flavor wise, this variety tops the competition. Brandywine's come in second place for us but they can grow into unusual shapes making them more challenging to prepare and eat. Mortgage lifters grow to a large round shape making it easy to slice, roast, can or freeze.

Background on the variety:
Mortgage Lifter heirloom tomato was developed in the early 1930's by a man named M.C. “Radiator Charlie” Byles. Byles was a radiator repairman who, like many of his countrymen, struggled to keep his finances in order during the Great Depression. As the story goes, Radiator Charlie cross-bred the largest tomatoes he could find in his hometown of Logan, West Virginia, and sold the resulting plants for a dollar each. The profits he earned were substantial enough that he was able to pay down his mortgage with them!

Mortgage Lifter is an indeterminate tomato variety, which means that the plants will grow vines and continue to grow taller as the gardening season progresses. Without pruning, the plant will continue to grow longer. To allow the plant to focus on growing higher yields of fruit, pinch the suckers on the tomato vine, and stake the plant well.

Reference: http://www.suite101.com/content/mortgage-lifter-heirloom-tomato-a53123

Thursday, January 6, 2011

Gardening with Kids


Gardening with Kids

One of my favorite aspects of growing plants indoors is to watch my daughter get so excited to watch these tiny seeds grow into fruit producing plants. At 3 years old she LOVES every step of the process. All of last year she would check on the plants through the day, sing songs to them and they would even get to hear about the highlights of her day.

I love that my daughter knows that lettuce grows from a little seed, it gets bigger and then we get to eat it. I've also found she is more open to eating vegetables once she has watched it grow.