Showing posts with label Starting Indoors. Show all posts

Thursday, January 6, 2011

Indoor Seed Planting Steps


Indoor Seed Planting Steps


1. Fill the container up to 3/4 inch from the top with the mixture to be used. It should be moistened before filling if the mixture is dry. Make sure the container has adequate drainage. Or use Jiffy Peat Pods and follow manufactures directions.

2. Level and gently firm the planting medium.

3. Plant 2-3 seeds per container with the intent to thin the weakest plants leaving just one plant per container (very fine seeds such as petunia need not be covered with soil, just moisten the surface with a fine mist. As a general rule, seeds other than the very fine seeds should be covered with soil the depth of size of the seed).

4. Cover containers with clear plastic. Since they retain moisture, no additional watering should be necessary until after seeds have germinated.

5. Place seeds in a warm location for germination. Generally, a range from 65 to 75 degrees Fahrenheit is best. The top of your fridge is a great location. Don't place covered containers in direct sunlight.

6. Watch daily for germination. Containers should be moved to bright light and the plastic bags removed as soon as germination is well under way. If not all seeds germinate at the same time, cut strips of plastic or cloth, and keep ungerminated rows covered until seedlings appear. Seeds are quickly killed if allowed to dry during germination.

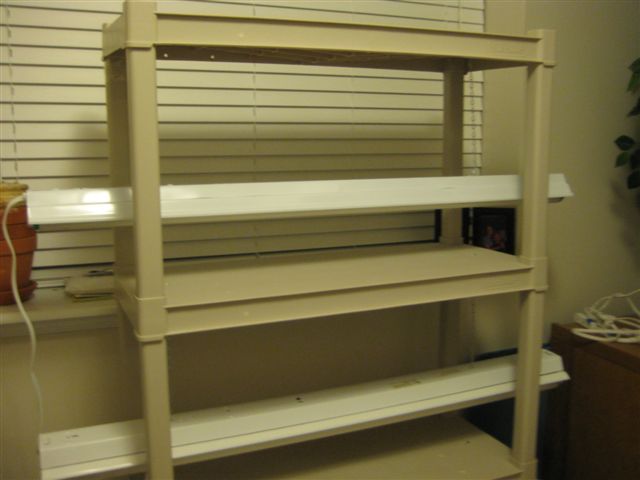
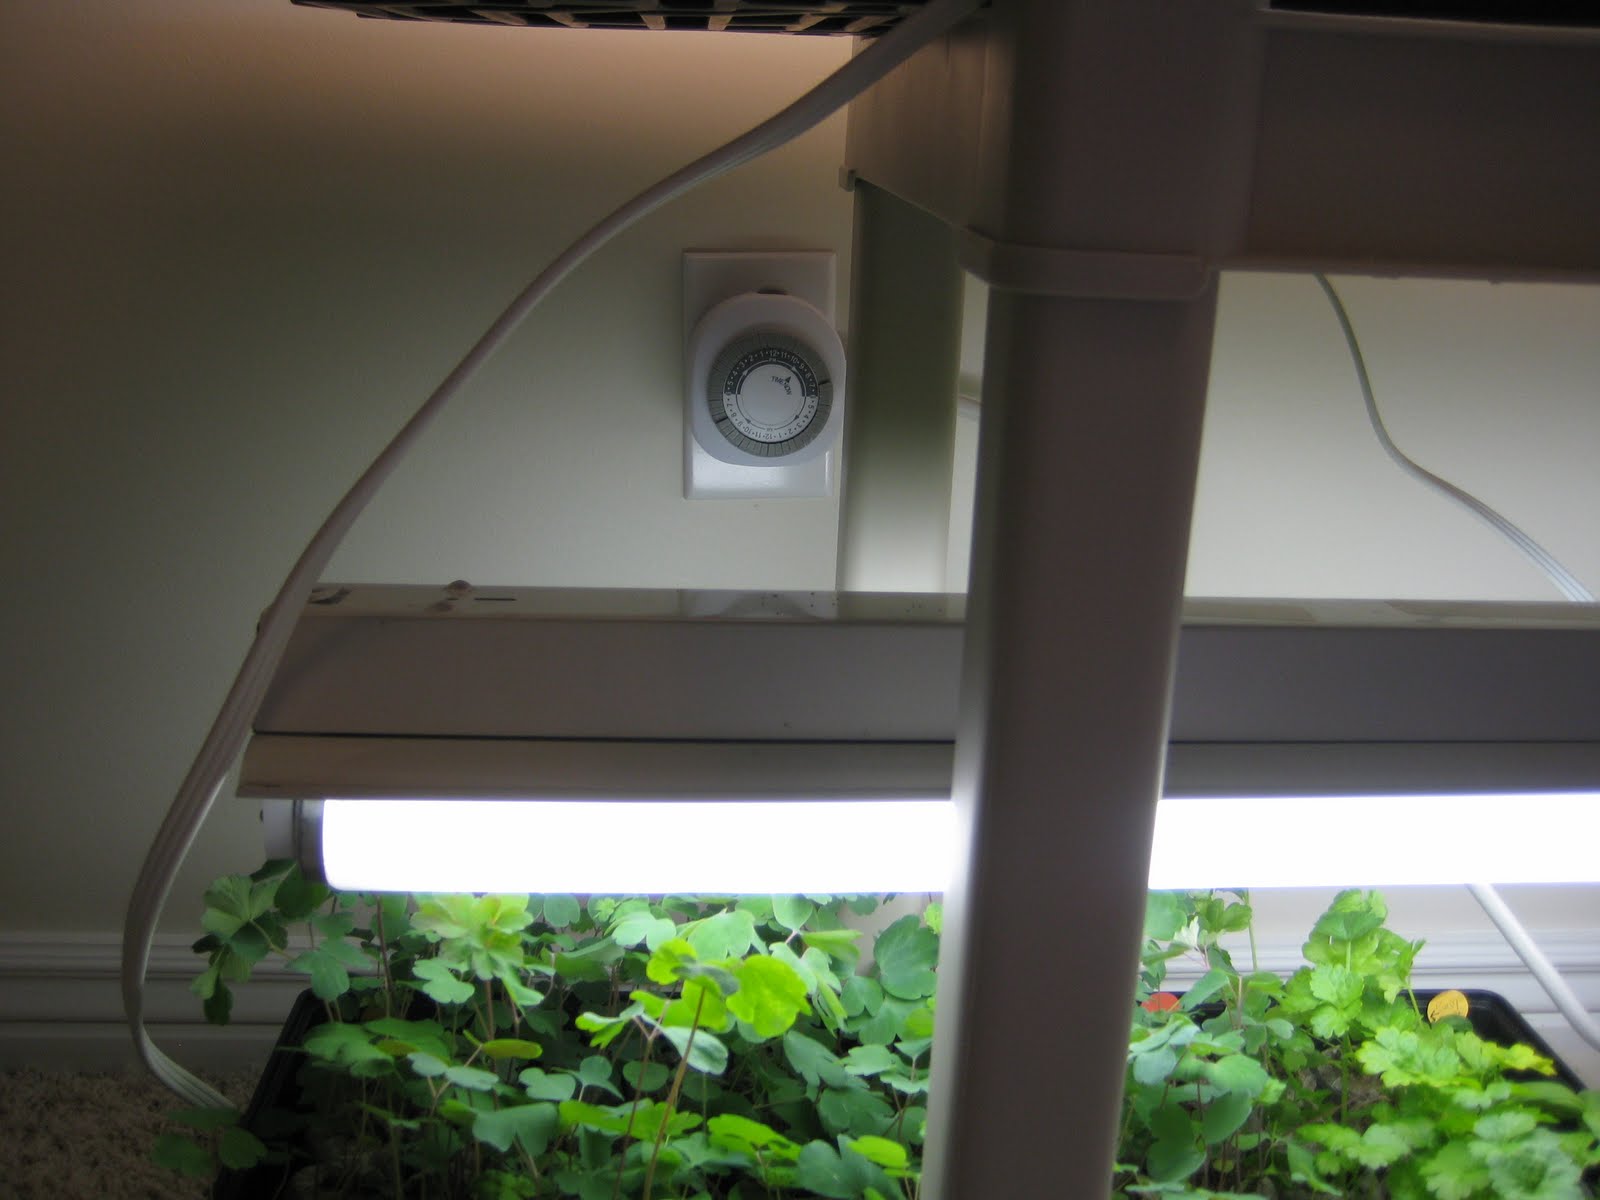
7. Place germinated seedlings in a bright south facing window or under florescent lights. Place the seedlings about 2-3 inches from the tubes and keep lights on for 14 to 16 hours each day. As seedlings grow, the lights will need to be raised to prevent leaves from touching the bulbs.

8. Water regularly and thin plants to one plant per pot.

Transitioning Outdoors


Transitioning Outdoors

Plants that have been growing indoors can't be planted abruptly into the garden without injury. To prevent any damage, they should be "hardened" before planting outdoors.

This process should be started at least two weeks before planting in the garden. If possible, plants should be moved to cooler temperatures outdoors in a shady location. When first put outdoors, keep in the shade, but gradually move plants into sunlight for short periods each day. Gradually increase the length of exposure. Don't put tender seedlings outdoors on windy days or when temperatures are below 45 degrees Fahrenheit. Reduce the frequency of watering to slow growth but don't allow plants to wilt.

Even cold-hardy plants such as cabbage and pansy will be hurt if exposed to freezing temperatures before they have been hardened. After proper hardening, however, they can be planted outdoors, and light frosts will not damage them.


Laundry Basket Tip:

Get some cheap plastic laundry baskets from the dollar store....you may even have some on hand already. Use the baskets that have a wide open-weave pattern in their sidewalls. Invert them over the flats of seeds you are hardening off outside. Put a brick or an old cooking pot filled with water on the basket to weight it down and keep it from blowing away. The baskets allow for some air flow but will protect the seedlings from direct overhead sunshine which will sunscald them, they will get filtered indirect light through the sidewalls and that is sufficient for the first week.

If you dip below 45 degrees at night you should bring the seedlings inside for the evening, but if it's been a very sunny day and the deck or patio where your flats are has absorbed a lot of solar-heat then you can simply toss a heavy blanket over the laundry baskets and at night the deck/patio will radiate it's retained warmth back into the air trapped under the basket by the blanket.

After about a week outdoors you can remove the basket for the early morning or afternoon, but still cover the flats with the baskets for midday. Obviously, if it's overcast, you won't have to worry too much about sunscald, but on sunny days it's a danger to the seedlings. It takes about two weeks to get indoor-started seedlings hardy enough to stay outdoors without protection once frosty nights have passed.
During the hardening-off period it is vital that you check the soil moisture of the flats on a daily basis. Most flats will need a thorough watering if it has been a sunny and/or windy day.

Starting Seeds Indoors


Starting Seeds Indoors

Supplies Needed
Cheap florescent shop lights
(1) warm and (1) cool light bulb for each shop light (don’t worry about buying the expensive “garden lights,” they don’t work any better than the warm/cool bulbs)
Extension cord
Timer
Location to hang the lights (a cheap plastic shelf works great and disassembles for easy storage during the off season)
Seed starting soil
Containers to grow seeds
Seeds


I’ve found the easiest way to start seeds indoors is to use a cheap plastic 4 shelf system that I can store under my bed during the summer and quickly set up in the late winter. They are usually $19.00 and work great for this purpose. We drilled holes in the shelves to hold the "S hooks" that hold the chains for the lights. I purchased 3 of the cheapest shop lights at Home Depot or Lowes. They were less than $10.

I also purchased one "cool" light bulb and one "warm" light bulb for each light set (with one of each you get the full spectrum of light except for red but plants don't need the red spectrum unless they are producing fruit). Don't waste your money on the expensive grow lights, the combination of the warm and cool work just as well. As the plants grow taller I adjust the chains the lights hang from and raise them up a little bit to keep the lights 2-3" above the plants.


I have a cheap timer that turns on and off each day giving the seeds 14-16 hours of light like this one. All 3 shop lights plug into the timer with a power strip.

I have tried several ways to start the seeds in a planting medium over the years and my favorite are the 72 pack sets of Jiffy peat pods at Walmart. Last year they were $5.00 and you can grow 72 plants in each set.


There is no mess, they are easy to water evenly and they are really quick to transplant. For years following you can buy just the pods and save the trays.

When you add water and plant the seeds, they look like this.

With the 3 shop lights I can grow 6 flats of the 72 sets of pods making room for 432 plants. If you don't want to grow that many, you can always start with one shop light. We have used this system for 5 years and are still very happy with how easy it is. I have a few friends who have duplicated the set up and are also very pleased with the results.